


Guide to Tractor Cultivator: Types, Benefits, and How to Attach Them
Jul 15, 2025 | 17 Mins Read


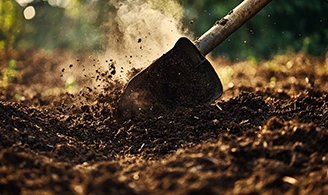
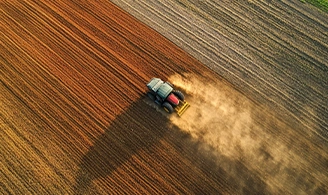
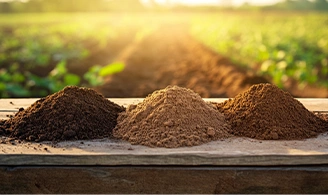
Tractor cultivators are powerful farming implements attached to a tractor, designed to efficiently prepare soil for planting and maintain healthy crop growth. These cultivators use rotating tines, blades, or discs to break up compacted soil, control weeds, and improve soil aeration. They are highly versatile, with different models available for various farming needs, from large-scale commercial farming to smaller, specialized applications. Tractor cultivators enhance soil structure, ensure better seedbed preparation, and increase operational efficiency, making them a crucial tool for modern agriculture. In this blog, we will explore the types of cultivators, their benefits and procedure to attach them.
Types of cultivators
There are several types of cultivators used in farming, each designed for different soil conditions, crop types, and farming practices. Here are the main types of cultivators:
There are several types of tractor cultivators, each designed for specific tasks and soil conditions. These cultivators vary in the mechanism used for soil preparation and can be selected based on the size of the farm, type of crops, and soil type.
1. Spring-tooth cultivators
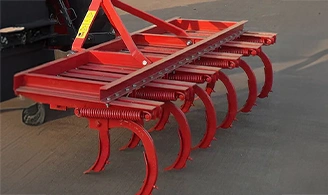
- Description: These feature spring-loaded tines that are designed to break up soil and control weeds without disturbing the soil structure too much.
- Use: Ideal for shallow cultivation in soft or loose soils. They are effective in managing light weed growth and improving soil aeration.
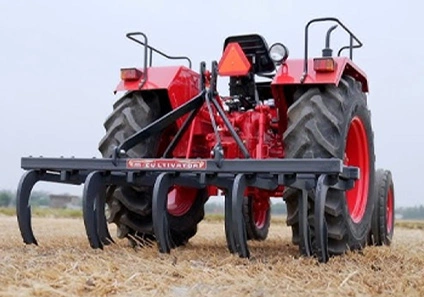
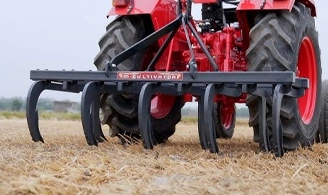
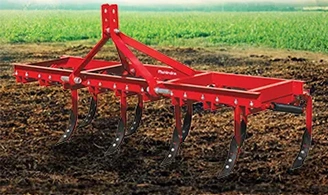
2. Rigid (standard) cultivators
- Description: These have fixed, sturdy tines or blades that penetrate the soil at a consistent depth. They are more aggressive than spring-tooth cultivators.
- Use: Suitable for deep tillage, preparing seedbeds, and breaking up compacted soils in larger, open fields.
3. Offset cultivators
- Description: These have an adjustable frame that allows the tools to be positioned slightly to the side of the tractor. This gives better maneuverability and allows the tractor to work around obstacles like crop rows.
- Use: Perfect for row crops and fields with narrow spaces between plants, allowing for more precise cultivation.
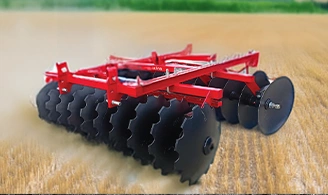
4. Disc cultivators
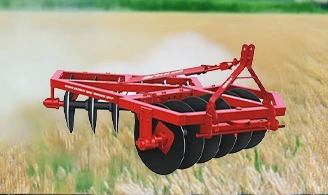
- Description: These use rotating discs (blades) that cut into the soil, breaking it up and turning it. The discs can be adjusted for depth and angle.
- Use: Best for breaking up tough, compacted soil, preparing seedbeds, and handling stony or heavy clay soils. They can also be used for soil mixing and aeration.
5. Hydraulic cultivators
- Description: These are operated using hydraulic systems, which allow for easy adjustment of the depth and angle of the cultivator's tines or blades.
- Use: Ideal for large-scale farming operations, where frequent adjustments are needed to accommodate different soil conditions and crop types.
6. Subsoiler cultivators
- Description: These are designed with long, heavy-duty tines that reach deep into the soil to break up compacted layers and improve drainage.
- Use: Primarily used for deep tillage and breaking up hardpans or compacted layers of soil that prevent water and roots from penetrating deeply.
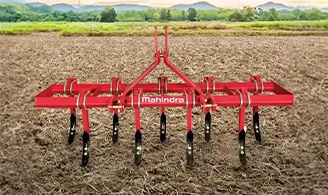
7. Row Crop cultivators
- Description: These are specifically designed for working between rows of crops like corn or soybeans. They have adjustable spacing between the cultivating tools to match row widths.
- Use: Used for weed control, soil aeration, and cultivation in row-planted crops. They can be fitted with various attachments like sweeps or shovels for precise cultivation.
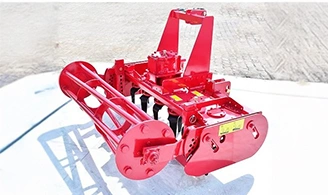
8. Rotary cultivators (rototillers)
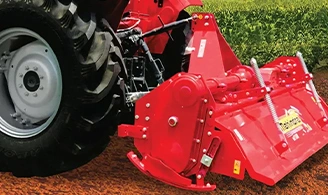
- Description: These use rotating blades or tines to break up the soil and mix in organic matter or fertilizers.
- Use: Often used for finer soil preparation, creating seedbeds, and mixing in compost. Common in smaller fields or gardens but can be adapted for larger areas with the right attachments.
9. Power harrows
- Description: Power harrows use rotating blades or tines to create a fine, well-mixed soil texture. They are typically used for preparing seedbeds before planting.
- Use: Ideal for fine seedbed preparation, especially in conditions where precise seed placement and soil consistency are important.
10. Moldboard ploughs (used in combination with cultivators)
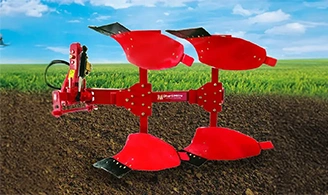
- Description: While technically a plough, moldboard ploughs are sometimes used in combination with cultivators for deep soil turning and breaking up compacted soil.
- Use: Moldboard ploughs turn the soil over, allowing subsequent cultivators to break it up further and prepare it for planting.
Choosing the right type of tractor cultivator depends on soil type, crop type, and the specific cultivation needs of the farm. Each type has its unique advantages and uses in modern agriculture.
Benefits of using a cultivator
Using a cultivator in agriculture offers numerous benefits that enhance soil health, crop growth, and overall farming efficiency. Here are the key advantages:
1. Weed control
- Cultivators help control weeds by uprooting them or disturbing their growth, reducing competition for water, nutrients, and sunlight. This helps improve crop yields and minimize the need for herbicides.
2. Soil aeration
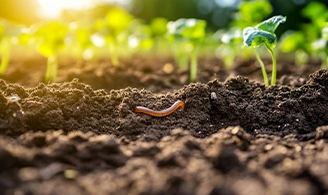
- By loosening and breaking up compacted soil, cultivators improve soil aeration. This allows roots to penetrate deeper, improves water infiltration, and promotes better nutrient uptake by plants.
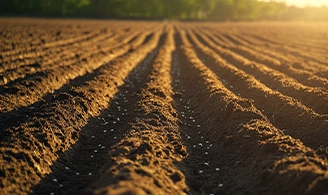
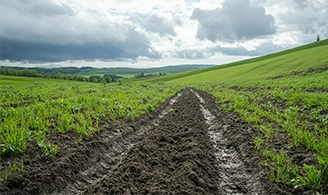
3. Improved soil structure
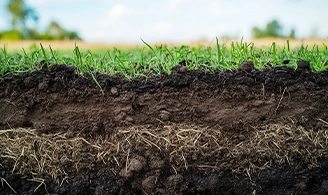
- Cultivation helps break up hard or compacted soil layers, creating a looser and more workable soil structure. This facilitates better root growth and promotes soil health over time.
4. Better water retention and drainage
- Loosening the soil improves water retention in dry conditions and helps with drainage in wet conditions. This reduces the risk of waterlogging and ensures consistent moisture for crops.
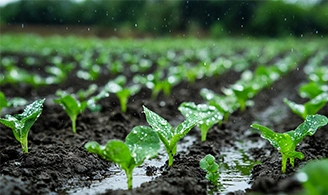
5. Enhanced seedbed preparation
- Cultivators create a fine, even seedbed that improves seed-to-soil contact, leading to more uniform germination and stronger plant growth.
6. Incorporation of organic matter
- Cultivators mix organic materials such as compost or crop residues into the soil, enriching the soil with nutrients and improving soil fertility.
7. Increased efficiency
- Cultivators save time and labor compared to manual methods of tilling or weeding. They allow farmers to cover large areas more quickly and with less physical effort.
8. Improved root development
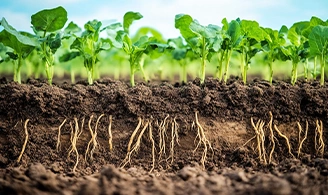
- By breaking up the soil and reducing compaction, cultivators help create an ideal environment for roots to grow, leading to healthier and stronger plants.
9. Reduced soil erosion
- Proper cultivation helps reduce the risk of soil erosion by improving soil structure, increasing organic matter, and promoting better water absorption, which helps keep the soil in place.
10. Adaptability to different soil types
- With various types of cultivators available, farmers can choose the right tool for different soil conditions, whether it’s heavy clay, sandy, or loamy soil, ensuring optimal performance and results.
By incorporating cultivators into farming practices, growers can boost productivity, promote healthy soil, and manage their crops more effectively.
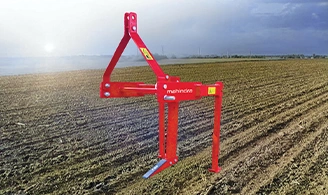
Attaching a cultivator to a tractor
Attaching a tractor cultivator is a straightforward process, but it’s important to follow safety procedures and ensure everything is properly aligned. Here's a step-by-step guide on how to attach a cultivator to a tractor:
1. Prepare the tractor and cultivator
- Turn off the engine and make sure the tractor is on stable, flat ground.
- Lower the cultivator (if it’s already in a raised position), either by using the hydraulic lift system or by manually adjusting the lift arms.
2. Align the cultivator
- Position the tractor so the rear hitch is close to the cultivator's attachment point. Make sure you’re able to access the hitch from behind the tractor easily.
- If the cultivator has any transport wheels, lower them to keep the cultivator level and easy to maneuver.
3. Attach the three-point hitch
- Locate the lower hitch arms on the tractor (usually two arms on either side of the tractor’s rear).
- Use the tractor's hitch system (three-point or two-point) to align the cultivator's hitch points with the tractor’s hitch.
- Lift the lower hitch arms and attach them to the corresponding pins or hooks on the cultivator's hitch points.
- Secure the pins using clips or locks to ensure they don’t come loose during operation.
4. Attach the top link
- The cultivator will also have an upper hitch point (a single attachment point on top).
- Connect the top link to the tractor’s upper hitch point and adjust the length of the top link to make sure the cultivator is level when raised.
- Tighten the top link to secure it in place. This will control the angle of the cultivator during use.
5. Check and adjust the cultivator
- Once everything is connected, raise the cultivator using the tractor’s hydraulic lift system.
- Check the leveling to make sure it’s at the desired height and working angle. Adjust the top link or side arms if necessary.
6. Test and inspect
- Before you start working with the cultivator, check for any loose parts or safety issues.
- Perform a slow test run in an open area to ensure the cultivator is operating properly.
Safety tips:
- Always make sure the tractor is off before making any adjustments.
- Wear appropriate safety gear and be cautious when working with the hitch and lifting arms.
- Never attempt to attach the cultivator while the tractor is running.
By following these steps, you should be able to attach the tractor cultivator securely and safely.
To conclude, tractor cultivators are indispensable tools in modern agriculture, offering a wide range of benefits for soil preparation, weed control, and crop maintenance. With various types available to suit different soil conditions, crop types, and farming scales, these cultivators play a crucial role in improving soil health, enhancing crop yields, and increasing operational efficiency. By selecting the right tractor cultivator for specific farming needs, farmers can optimize their productivity and ensure a healthier, more sustainable farming environment.
Recent Articles
Tag Cloud
Connect With Us


Jul 15, 2025
Jul 21, 2025

You May Also Like
- Read More
 Which is the Best Tractor for Farming in India?
Farming tractors are the essential companions of farmers; these robust machines help them work...
- Read More
 Choosing the Right Tractor for Groundnut Farming
Groundnut, or peanut, is grown in five states of India, namely Andhra Pradesh, Gujarat, Tamil Nadu, Karnataka, Rajasthan and Maharashtra.
- Read More
 Mahindra’s Tractor’s Potato Farming Guide
Paddy farming is one of India’s most prevalent farming methods that use small, flooded fields to cultivate rice.
- Read More
 Why Buy a Mahindra 275 DI XP Plus Tractor: Mileage, Features & Specs
The Indian Tractor market is unique—farmers are looking for an all-rounder tractor that satisfies all their needs while being affordable and powerful. One such tractor that meets the demands of Indian farmers is the Mahindra 275
