


How to Install a Tractor Land Leveler: Setup & Maintenance Guide
Sep 29, 2026 | 5 Mins Read


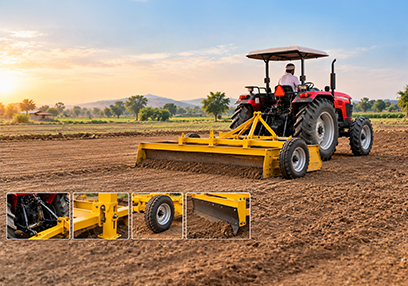
Table of Content
A properly levelled field is essential for efficient and productive farming. Uneven land can lead to irregular water distribution, soil erosion, waterlogging, and inefficient use of seeds, fertilisers, and other agricultural inputs. A tractor land leveler is a practical solution that helps farmers create a more uniform field surface while reducing the time and labour required for traditional land levelling.
Designed to work with tractors, modern land levellers are among the useful tractor attachments for land preparation and field management. However, correct installation, adjustment, operation, and regular tractor maintenance are important to achieve consistent results and extend the life of both the tractor and implement.
This guide explains how to install a tractor land leveler, prepare it for field operation, and maintain it properly.
What Is a Tractor Land Leveler?
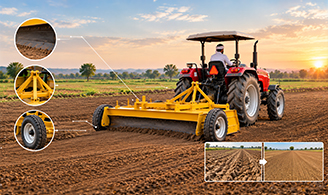
A tractor land leveler is an agricultural implement used to remove minor unevenness from the soil surface. It typically consists of a strong levelling blade or scraper assembly attached to a tractor through a suitable hitching system.
During operation, the blade cuts high spots and distributes soil into low areas, helping create a more uniform field surface. Depending on the design, the implement may be used for primary or secondary land preparation, field maintenance, seedbed preparation, and other soil-levelling applications.
Land levelling can be particularly beneficial for irrigation because a relatively uniform surface allows water to spread more evenly across the field.
Benefits of Using a Tractor Land Leveler
Before discussing installation, it is useful to understand why farmers use land levelling equipment.
A properly operated land leveler can help:
- Improve field uniformity
- Promote more even irrigation
- Reduce water accumulation in low areas
- Minimise unnecessary soil movement
- Improve seedbed preparation
- Reduce manual labour
- Save time during field preparation
- Improve the efficiency of subsequent farming operations
Because the implement is tractor-operated, it can cover larger areas efficiently compared with manual levelling methods.
Step 1: Check Tractor and Implement Compatibility
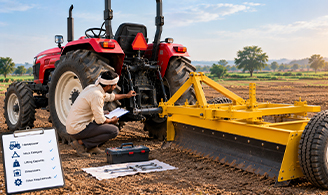
The first step in installing a land leveler is ensuring that it is compatible with your tractor.
Check the implement manufacturer's specifications for required tractor horsepower, hitch category, lifting capacity, dimensions, and other requirements. A compact tractor may be suitable for smaller land levellers, while larger agricultural tractors may be required for heavy-duty models.
Do not attach an implement simply because the hitch appears physically compatible. The tractor must have adequate power and hydraulic lifting capacity for the implement and the soil conditions in which it will operate.
Step 2: Inspect the Land Leveler
Before connecting the implement, conduct a thorough inspection.
Check the:
- Levelling blade
- Main frame
- Hitch points
- Pins and locking mechanisms
- Hydraulic components, if fitted
- Fasteners and bolts
- Wear areas
- Safety components
Look for cracks, excessive wear, loose bolts, damaged hydraulic hoses, or other visible problems. Repair or replace damaged components before field operation.
This inspection is an important part of tractor maintenance and implement maintenance because it can help prevent breakdowns and unsafe operating conditions.
Step 3: Park the Tractor Safely
Park the tractor on firm, level ground before attaching the implement. Switch off the engine, engage the parking brake, and follow the manufacturer's safety instructions.
The tractor and implement should remain stable while you position the hitch components. Never place yourself between the tractor and implement while either machine is moving.
If assistance is required during attachment, ensure that everyone involved understands the correct safety procedure.
Step 4: Connect the Three-Point Hitch
Many tractor land levellers are designed for three-point hitch systems.
Reverse the tractor slowly towards the implement, aligning the lower lift arms with the corresponding hitch points. Attach the lower links using the appropriate hitch pins and secure them with locking devices.
Next, connect the top link to the upper hitch point. Adjust the top link according to the manufacturer's instructions.
After connecting all three points, check that the implement is securely attached and that the hitch pins and retaining devices are properly locked.
Step 5: Connect Hydraulic Components, If Required
Some advanced land levellers may have hydraulic adjustment systems. If your implement uses hydraulics, connect the hydraulic hoses to the tractor's appropriate hydraulic outlets.
Inspect the hoses and couplers before connecting them. Ensure connections are clean and secure.
After starting the tractor, operate the hydraulic system carefully and check for leaks. Never use your hands to locate a hydraulic leak because high-pressure hydraulic fluid can cause serious injuries.
Step 6: Adjust the Leveler
Correct adjustment is essential for effective levelling.
Start by positioning the implement according to the manufacturer's recommended settings. The blade should be positioned so that it can move soil from higher areas towards lower areas without unnecessarily digging deep into the field.
The top-link adjustment can influence the working angle of the implement, while the tractor's three-point hitch controls its operating height.
Make small adjustments and test the implement in a limited section of the field before beginning full-scale work.
Step 7: Test the Implement
After installation and adjustment, conduct a short test run.
Operate the tractor at a suitable speed and observe how the blade interacts with the soil. Check whether it is:
- Cutting excessive amounts of soil
- Leaving high spots untouched
- Creating new ridges
- Causing excessive wheel slip
- Operating unevenly
- Putting excessive load on the tractor
If the results are not satisfactory, stop and adjust the implement rather than attempting to compensate by dramatically increasing tractor speed or engine load.
Using a Tractor Land Leveler Effectively
Field conditions have a major impact on levelling performance. Extremely wet soil can stick to the blade and increase draft requirements, while excessively dry and hard soil may require considerable tractor power.
Avoid operating at unnecessarily high speeds. Excessive speed can reduce levelling accuracy and place additional stress on the tractor and implement.
For a compact tractor, it is particularly important to select an appropriately sized land leveler. Matching implement size to tractor capability helps maintain stability and efficient power utilisation.
Tractor Land Leveler Maintenance
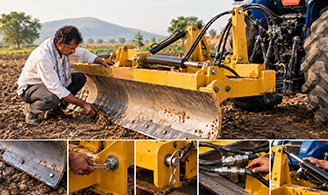
Regular maintenance is essential for reliable performance. After every use, inspect the implement for accumulated soil, stones, plant residues, and other debris.
Clean the blade and frame before storing the equipment. Removing soil can help prevent corrosion and makes it easier to identify cracks or damaged components.
Inspect bolts, nuts, hitch pins, and other fasteners regularly. Tighten loose components according to the manufacturer's recommendations.
The levelling blade is a wear component and may gradually lose its effectiveness. Inspect its cutting edge and replace or service it when required.
For hydraulic models, inspect hoses, couplers, and cylinders for leakage, damage, or wear.
Tractor Maintenance Before and After Operation
Proper tractor maintenance is just as important as maintaining the implement. Before using a land leveler, check engine oil, coolant, hydraulic fluid, tyre pressure, and other items specified in the tractor's maintenance schedule.
Also inspect the three-point hitch and PTO area, even if the implement does not use PTO power. Ensure that the tractor's braking and steering systems are functioning correctly.
After completing the operation, clean the tractor and implement and inspect them for signs of abnormal wear or damage.
Storage Tips
At the end of the land-preparation season, store the tractor land leveler in a clean, dry and preferably covered location. Lower the implement securely to the ground rather than leaving it suspended from the tractor's hydraulic system.
Clean and dry metal surfaces before long-term storage. Apply protective treatment where recommended by the manufacturer, particularly in areas exposed to moisture.
Keeping tractor attachments properly stored can significantly improve their service life and ensure that they are ready for the next season.
Conclusion
Installing a tractor land leveler correctly is essential for achieving effective and consistent field levelling. From checking tractor compatibility and inspecting the implement to connecting the three-point hitch, adjusting, and conducting a test run, every step contributes to safe and efficient operation.
Farmers should select an appropriately sized implement for their tractor, including a compact tractor where suitable, and avoid exceeding the tractor's recommended operating capacity. Regular cleaning, inspection, lubrication where required, and replacement of worn components can further improve implement performance.
Finally, good tractor maintenance should always accompany implement maintenance. With proper installation, careful operation, and routine servicing, a land leveler can become one of the most useful tractor attachments for efficient land preparation and better field management.
Recent Articles
Tag Cloud
Connect With Us


Sep 29, 2026

Sep 29, 2026

You May Also Like
- Read More
 Which is the Best Tractor for Farming in India?
Farming tractors are the essential companions of farmers; these robust machines help them work...
- Read More
 Choosing the Right Tractor for Groundnut Farming
Groundnut, or peanut, is grown in five states of India, namely Andhra Pradesh, Gujarat, Tamil Nadu, Karnataka, Rajasthan and Maharashtra.
- Read More
 Mahindra’s Tractor’s Potato Farming Guide
Paddy farming is one of India’s most prevalent farming methods that use small, flooded fields to cultivate rice.
- Read More
 Why Buy a Mahindra 275 DI XP Plus Tractor: Mileage, Features & Specs
The Indian Tractor market is unique—farmers are looking for an all-rounder tractor that satisfies all their needs while being affordable and powerful. One such tractor that meets the demands of Indian farmers is the Mahindra 275


 Not happy
 Could be better
 It's okay
 Good
Good Excellent